
Reflection & Refraction
카테고리: Metal
Main Reference
- Metal by Tutorials - 4th edition
We’re approaching a time where ray tracing algorithms may be viable in games, but for now, real time rendering with rasterized reflection and refraction is the way to go.
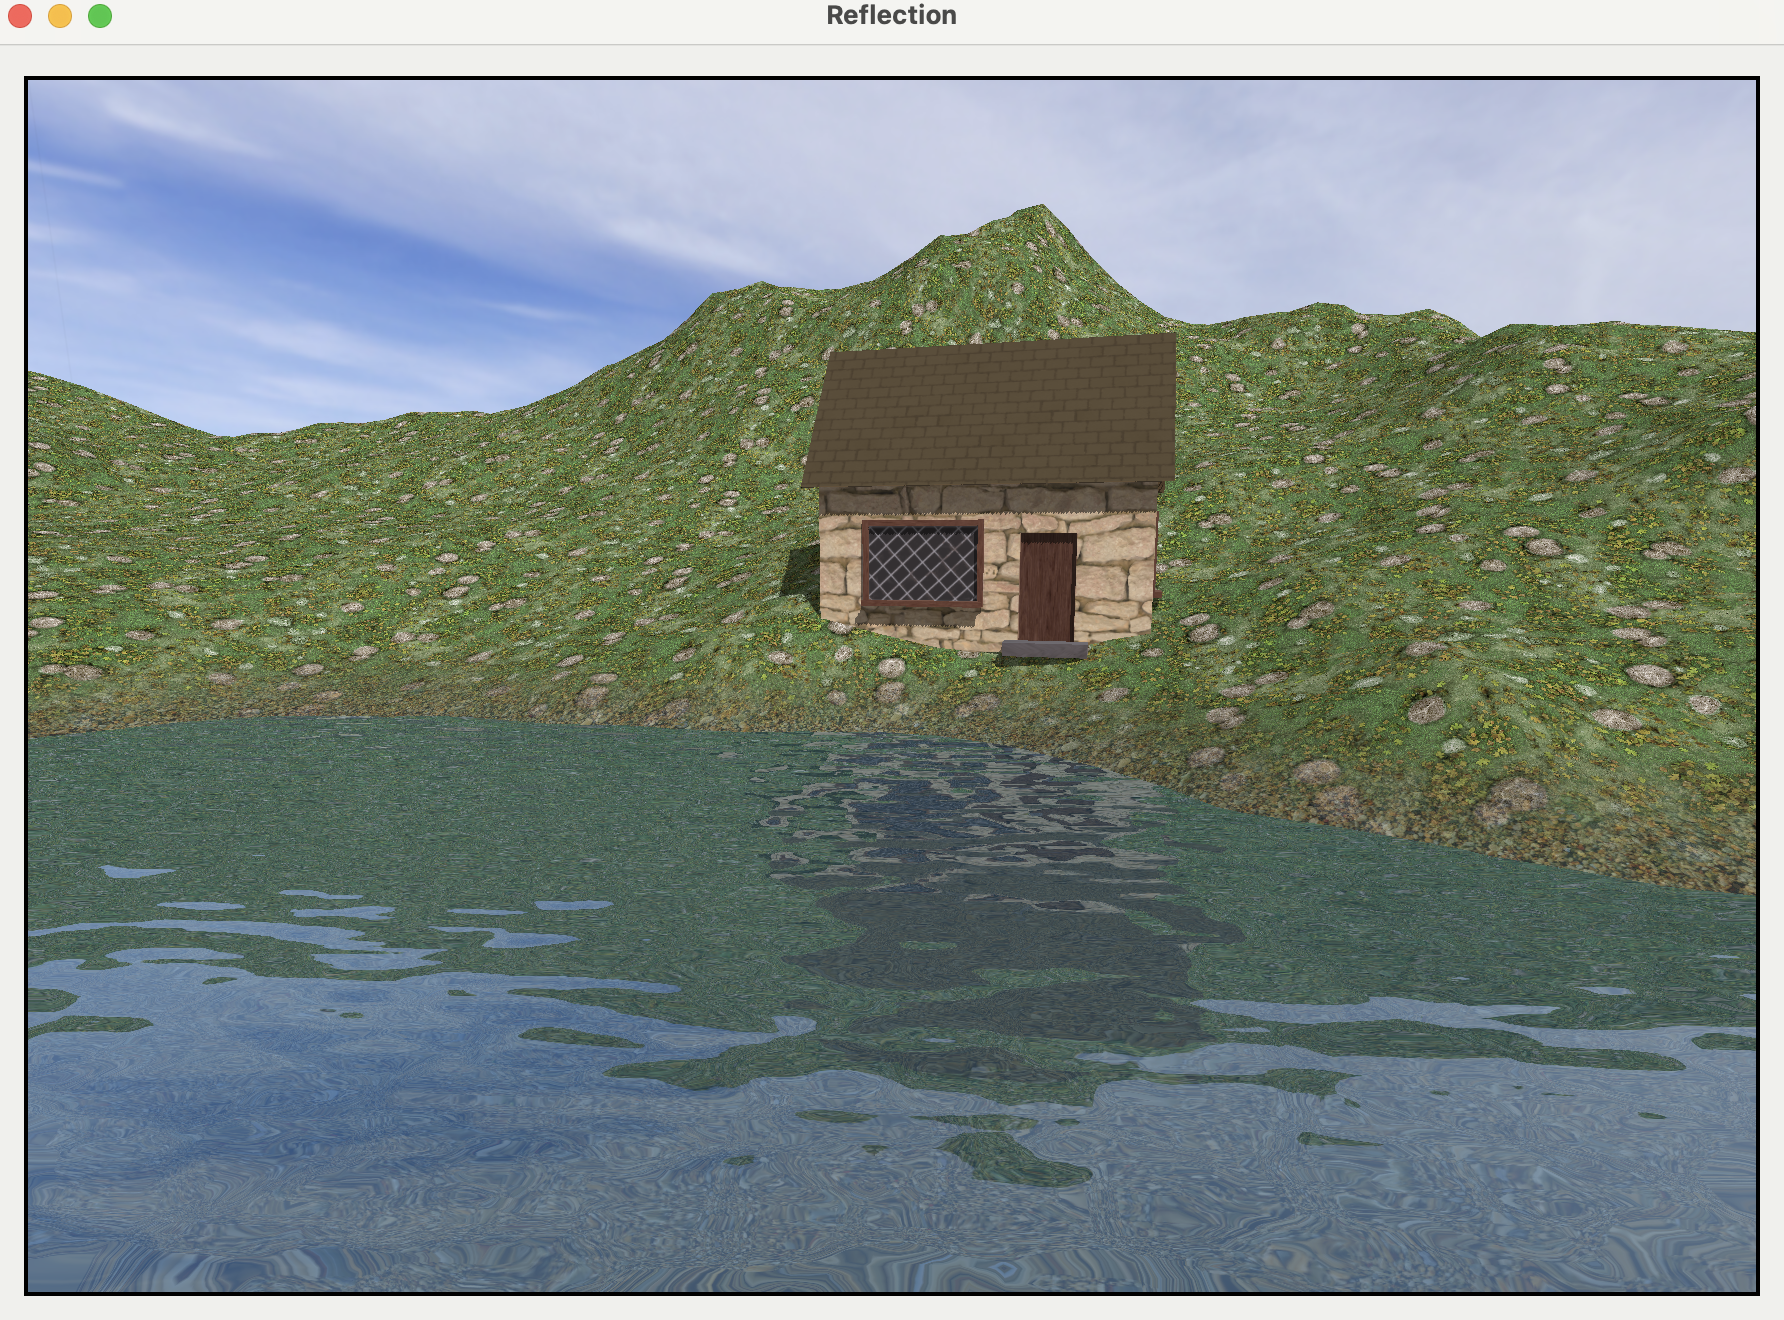
Rendering Rippling Water
- Render a large horizontal quad that will be the surface of the water.
- Render the scene to a reflectio texture.
- Use a clipping plane to limit what geometry you render.
- Distort the reflection using a normal map to create ripples on the surface.
- Render the scene to refraction texture.
- Apply the Fresnel effect so that the dominance of each texture will change depending on the viewing angle.
- Add smoothness to the water depth visibility using a depth texture.
Rendering the Reflection
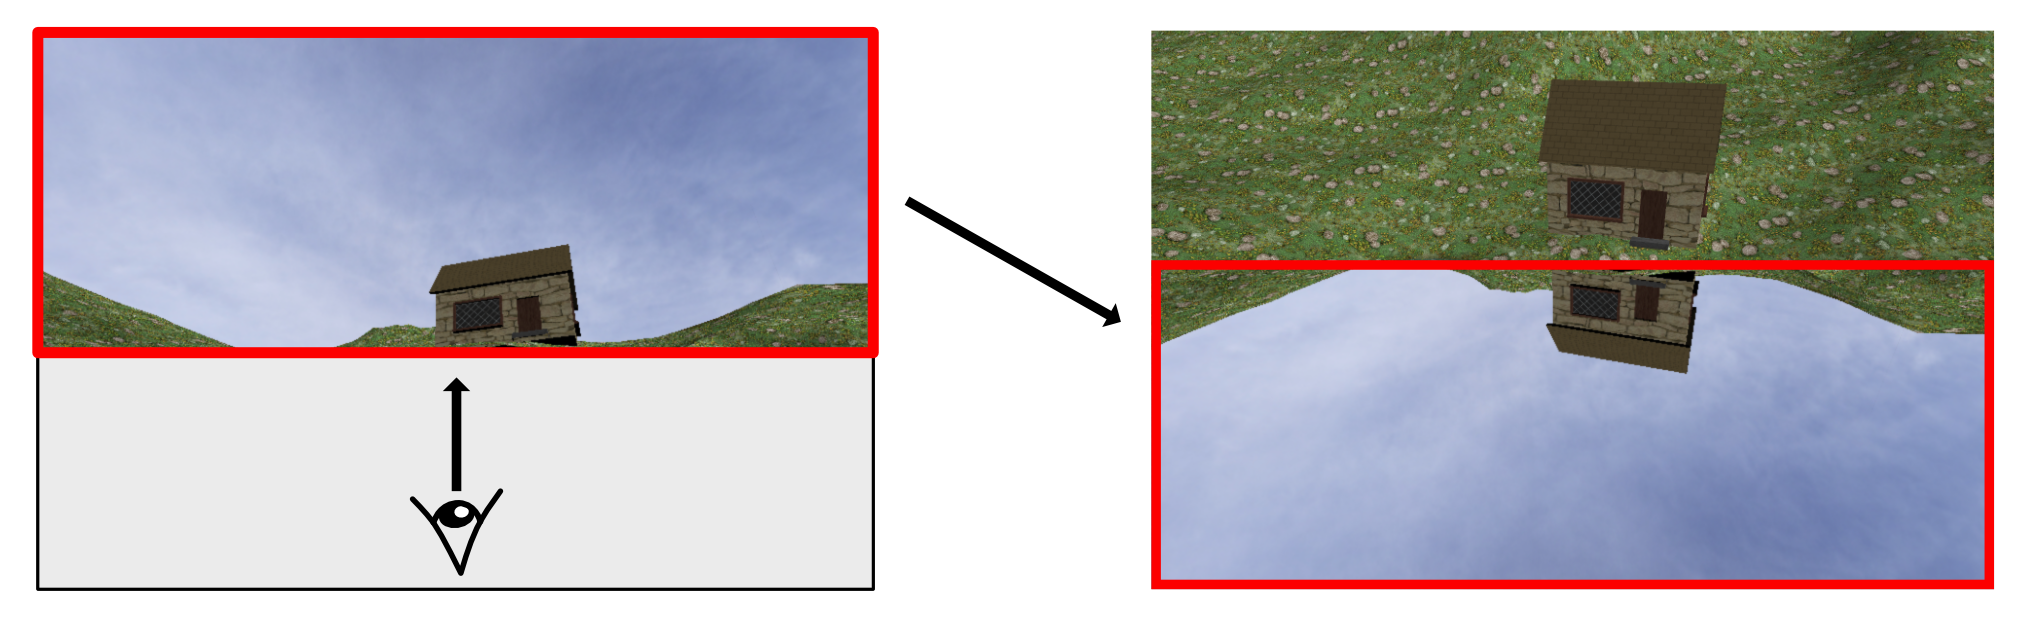
The water plane should reflect its surroundings. In previous chapther, you reflected the skybox onto objects, but this time you’re also going to reflect the gouse and terrain on ther water.
In WaterRenderPass you’re render the scene to a texture from a point underneath the water pointing upwards. You’ll then take this texture and render it flipped on the water surface.
// In WaterRenderPass..
mutating func resize(view: MTKView, size: CGSize) {
  let size = CGSize(width: size.width / 2, height: size.height / 2)

  reflectionTexture = Self.makeTexture(
	size: size,
	pixelFormat: view.colorPixelFormat,
	label: "Reflection Texture")

  refractionTexture = Self.makeTexture(
	size: size,
	pixelFormat: view.colorPixelFormat,
	label: "Refraction Texture")

  depthTexture = Self.makeTexture(
	size: size,
	pixelFormat: .depth32Float,
	label: "Reflection Depth Texture")
}
For reflection and refraction you don’t really need sharp images, so you create the textures at half the usual size.
  func draw(
    commandBuffer: MTLCommandBuffer,
    scene: GameScene,
    uniforms: Uniforms,
    params: Params
  ) {
	  guard let water = scene.water else { return }
      water.reflectionTexture = reflectionTexture
      water.refractionTexture = refractionTexture
      water.refractionDepthTexture = depthTexture

      let attachment = descriptor?.colorAttachments[0]
      attachment?.texture = reflectionTexture
      attachment?.storeAction = .store
      let depthAttachment = descriptor?.depthAttachment
      depthAttachment?.texture = depthTexture
      depthAttachment?.storeAction = .store

      guard let descriptor = descriptor,
      let renderEncoder = commandBuffer.makeRenderCommandEncoder(
        descriptor: descriptor) else {
	      return
	   }
    renderEncoder.label = label

    render(
      renderEncoder: renderEncoder,
      scene: scene,
      uniforms: uniforms,
      params: params)
    renderEncoder.endEncoding()
  }
- Descriptor를 이용한 render target을 지정하는 작업은 render encoder를 생성하기 직전에 하는게 일반적이다.
- 안전성 & 유연성
- 왜 init()에서 하지 않고, 매 프레임 호출되는 draw에서 하는지 의문이었음
fragment float4 fragment_water(VertexOut in [[stage_in]],
constant Params ¶ms [[buffer(ParamsBuffer)]],
texture2d<float> reflectionTexture [[texture(0)]],
texture2d<float> refractionTexture [[texture(1)]])
{
constexpr sampler s(filter::linear, address::repeat);
float width = float(reflectionTexture.get_width() * 2.0);
float height = float(reflectionTexture.get_height() * 2.0);
float x = in.position.x / width;
float y = in.position.y / height;
float2 reflectionCoords = float2(x, 1 - y);
float4 color = reflectionTexture.sample(s, reflectionCoords);
color = mix(color, float4(0.0, 0.3, 0.5, 1.0), 0.3);
return color;
}
- reflection texture를 생성할 때 window size의 절반을 기준으로 만들었기 때문에 width/height x 2
- reflected image이기 때문에
inverted y사용
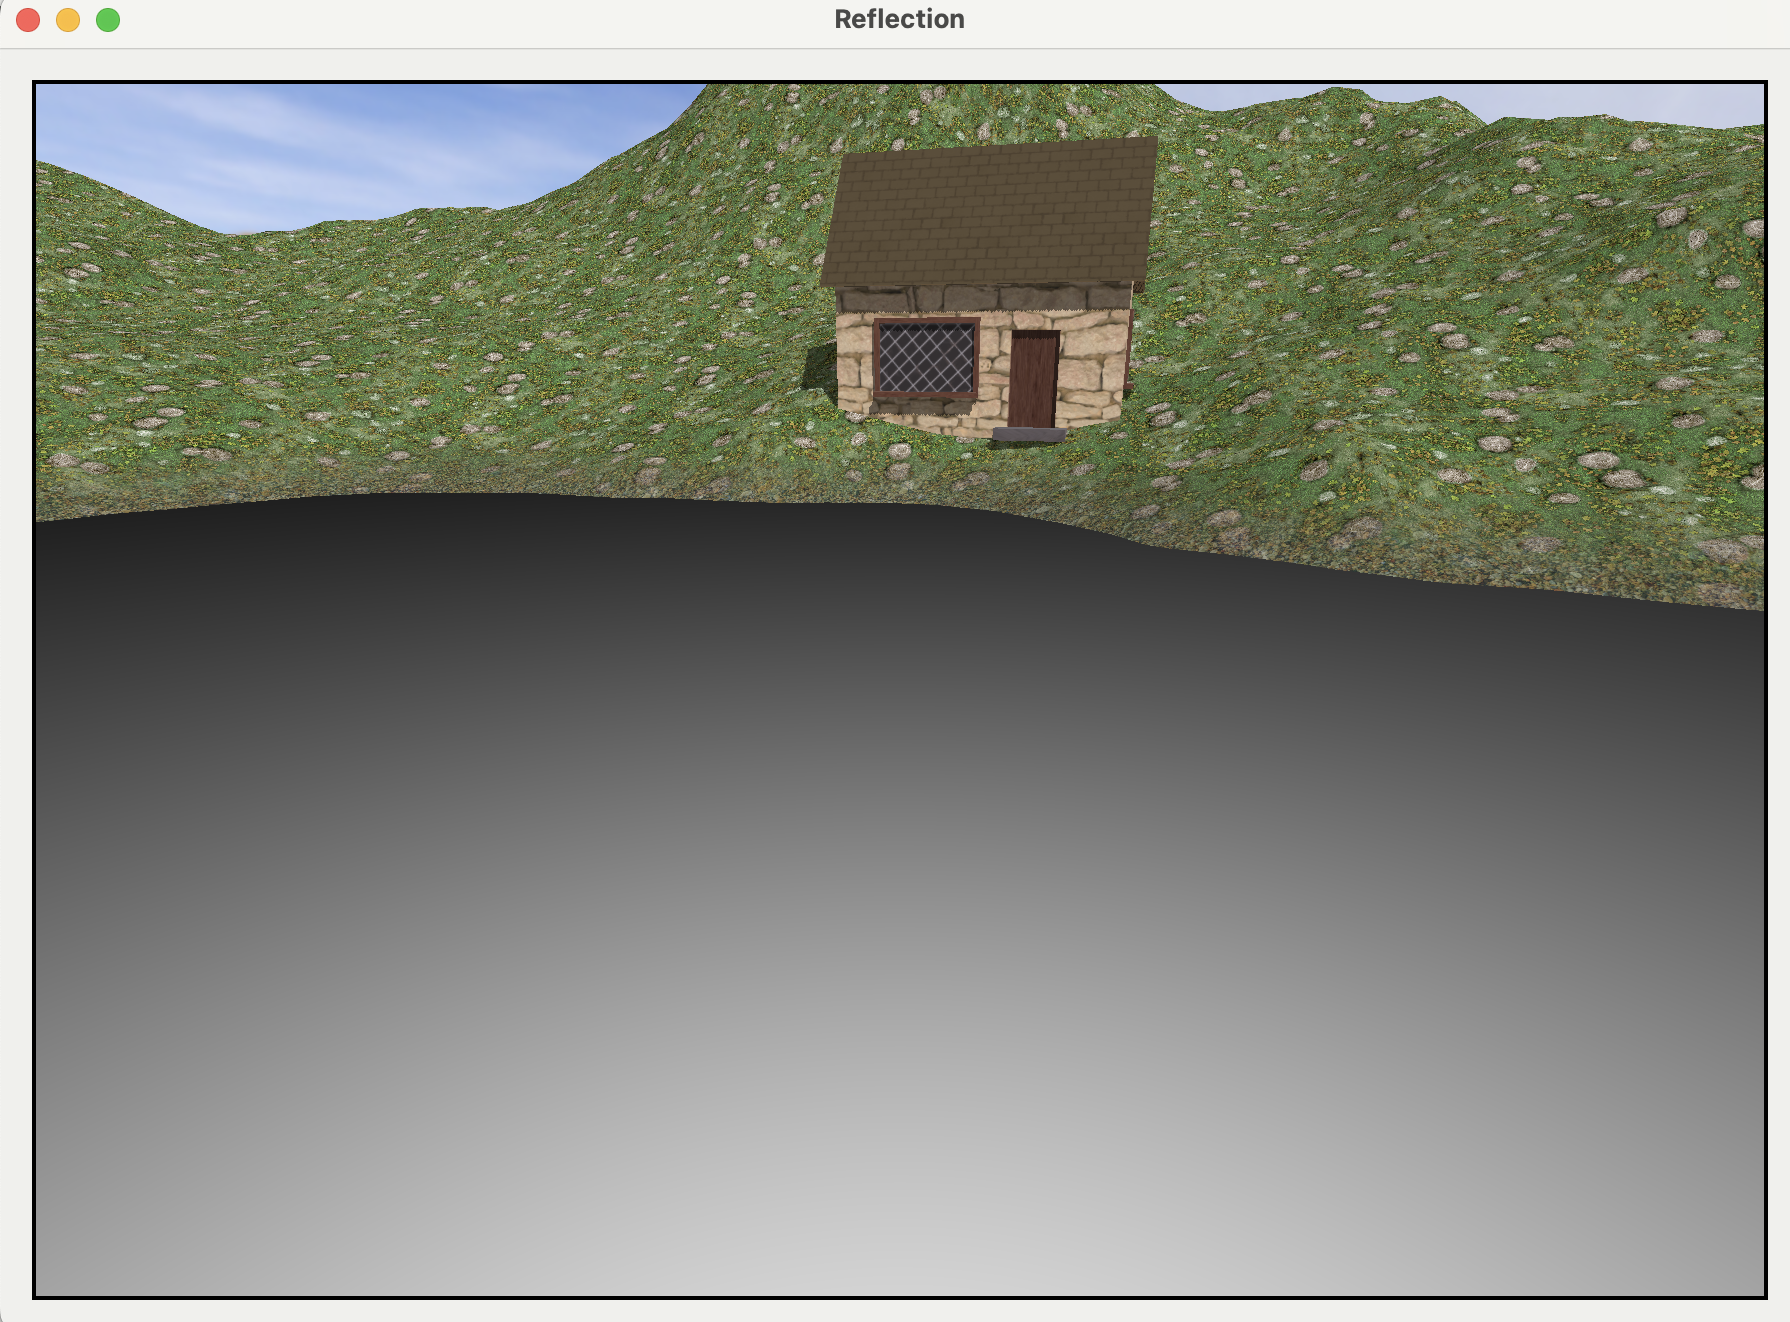
Clipping Planes
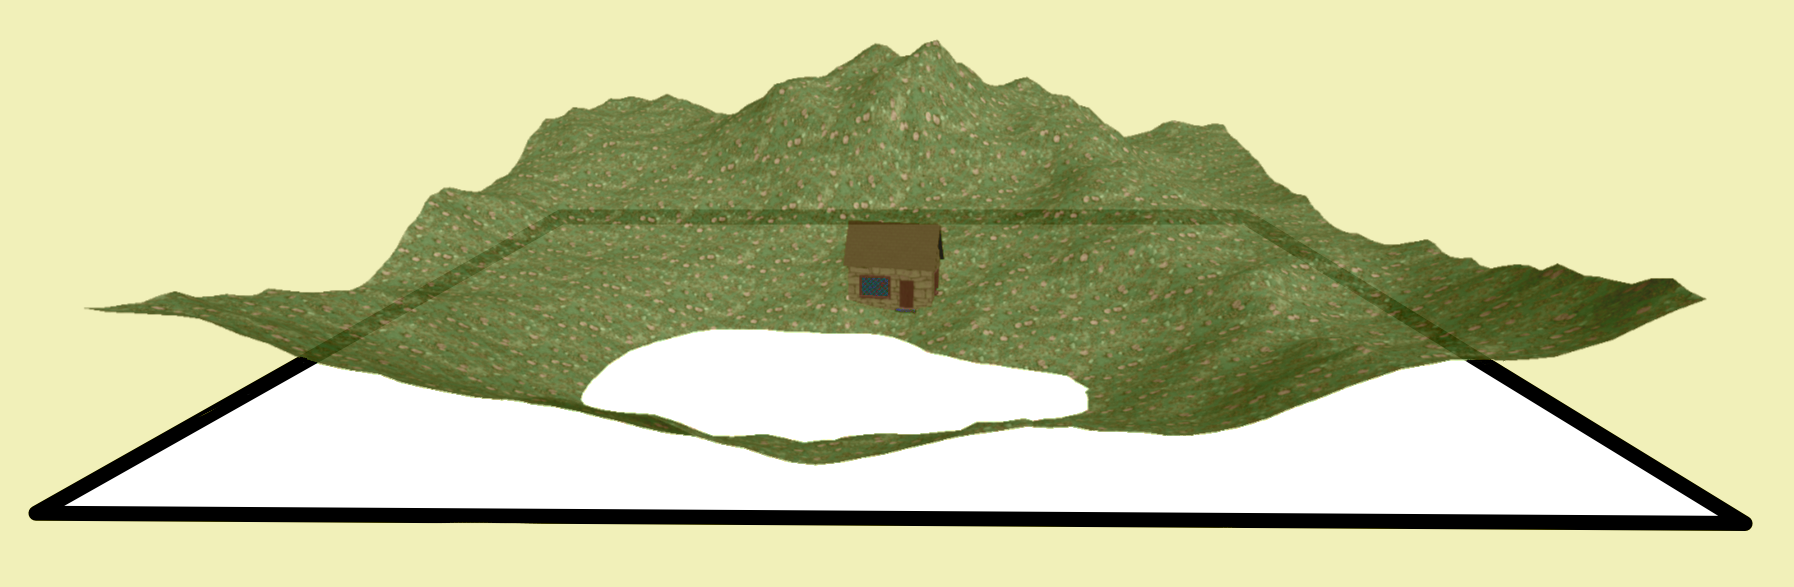
A clipping plane, as its name suggests, clips the scene using a plane. It’s hardware accelerated, meaning that if geometry is not within the clip range, the GPU immediately discards the vertex and doesn’t put it through the entire pipeline.
- 즉, 가상의 평면을 수면 높이에 설치하여, 물 아래에 반사에 보일 필요가 없는 부분들을 제거해 렌더링하지 않는 기법
- 하드웨어 수준에서 빠르게 검사가 가능하고, primitive(삼각형) 단위로 geometry 제거
// ShaderDef.h
struct VertexIn {
  float4 position [[attribute(Position)]];
  float3 normal [[attribute(Normal)]];
  float2 uv [[attribute(UV)]];
  float3 tangent [[attribute(Tangent)]];
  float3 bitangent [[attribute(Bitangent)]];
};

struct VertexOut {
  float4 position [[position]];
  float3 normal;
  float2 uv;
  float3 worldPosition;
  float3 worldNormal;
  float3 worldTangent;
  float3 worldBitangent;
  float4 shadowPosition;
  float clip_distance [[clip_distance]] [1];
};

struct FragmentIn {
  float4 position;
  float2 uv;
  float3 color;
  float3 worldPosition;
  float3 worldNormal;
  float3 worldTangent;
  float3 worldBitangent;
  float4 shadowPosition;
};
- 일반적으로
VertexOut과FragmentIn은 완전하게 동일하기 때문에 별도의 구조체 선언을 하지 않음 [[clip_distance]]속성은 vertex function에서만 사용할 수 있는 특별한 출력 속성.- 뒤에 붙은
[1]은 clip_distance 값을 담을 배열의 크기. - 현재 clip plane이 하나이므로 배열의 크기는 1
- Rasterizer는 interpolated된 clip_distance 값을 체크하여, 값이 음수이면 clipping
- 뒤에 붙은
[[clip_distance]]속성을 제외한FragmentIn구조체를 별도로 선언해 사용해야 함
let clipPlane = float4(0, 1, 0, -water.position.y)
uniforms.clipPlane = clipPlane

// In vertex function..
VertexOut out;
// ...
out.clip_distance[0] =
	dot(uniforms.modelMatrix * in.position, uniforms.clipPlane);
- clipPlane은
float4(A, B, C, D)형태로 정의하며,Ax + By + Cz + D = 0평면과 대응- (A, B, C) : normal vector of plane
- D : translated value
dot(uniforms.modelMatrix * in.position, uniforms.clipPlane)- 평면의 방정식과 world position 값을 내적하면
-
0 : 점이 평면의 위쪽 (normal 방향)
- = 0 : 점이 평면 위에 존재
- < 0 : 점이 평면 아래쪽 (normal 반대) -> clipped

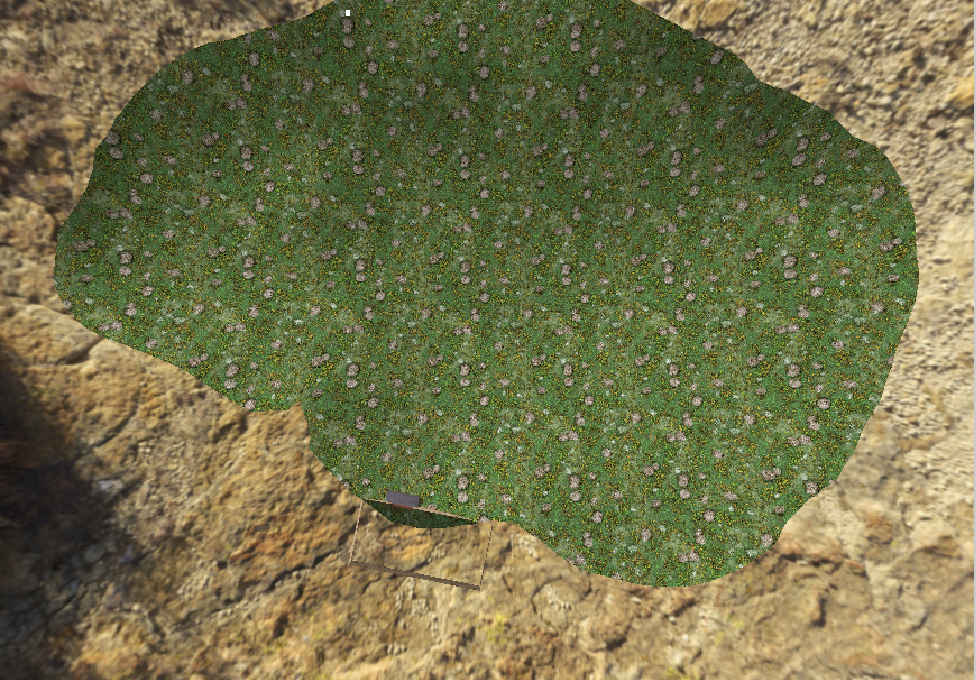
WarterRender Pass 를 확인해 보면, terrain은 잘려나가 있고, 그 자리에 skybox가 렌더링 됨
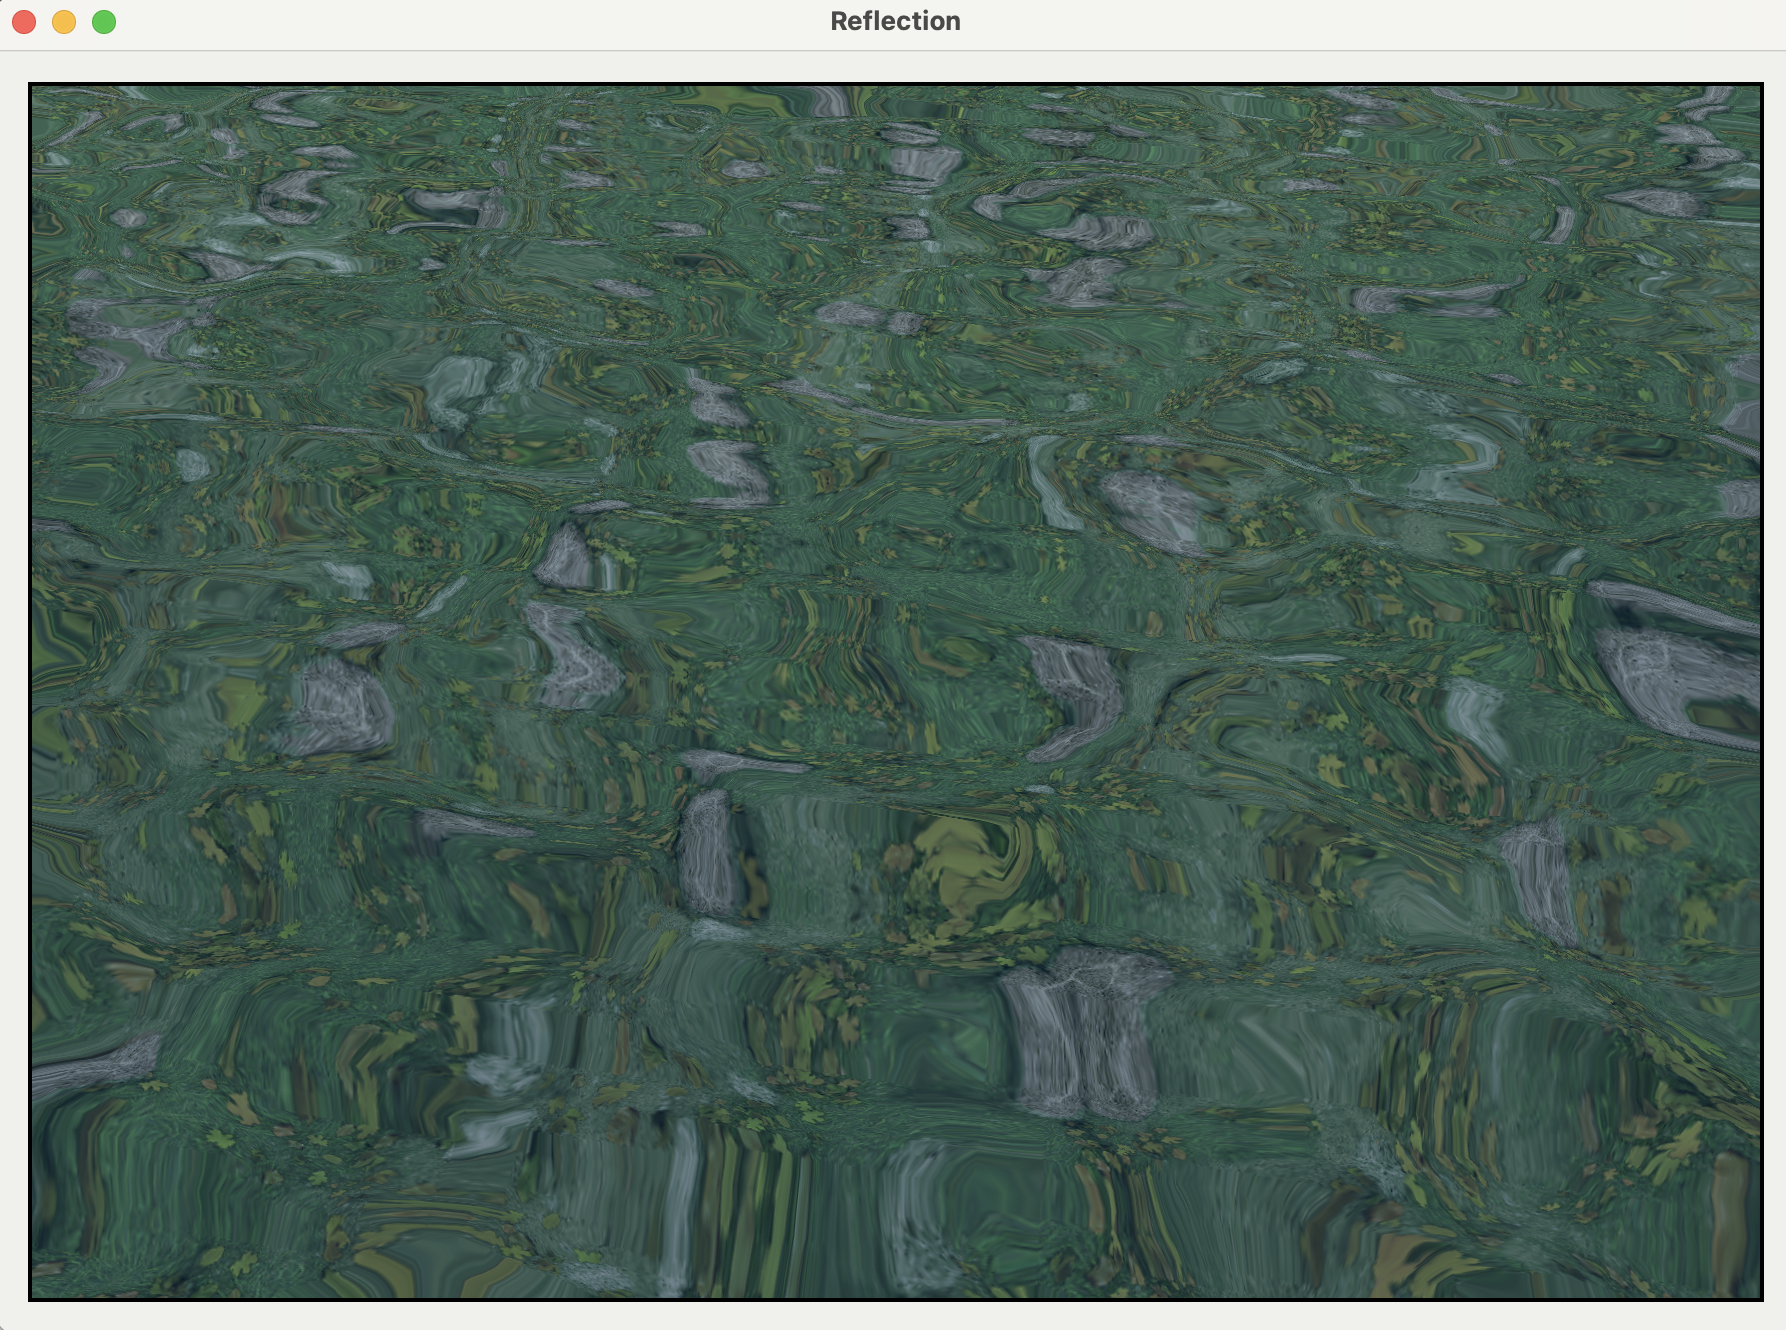
Rippling Normal Maps
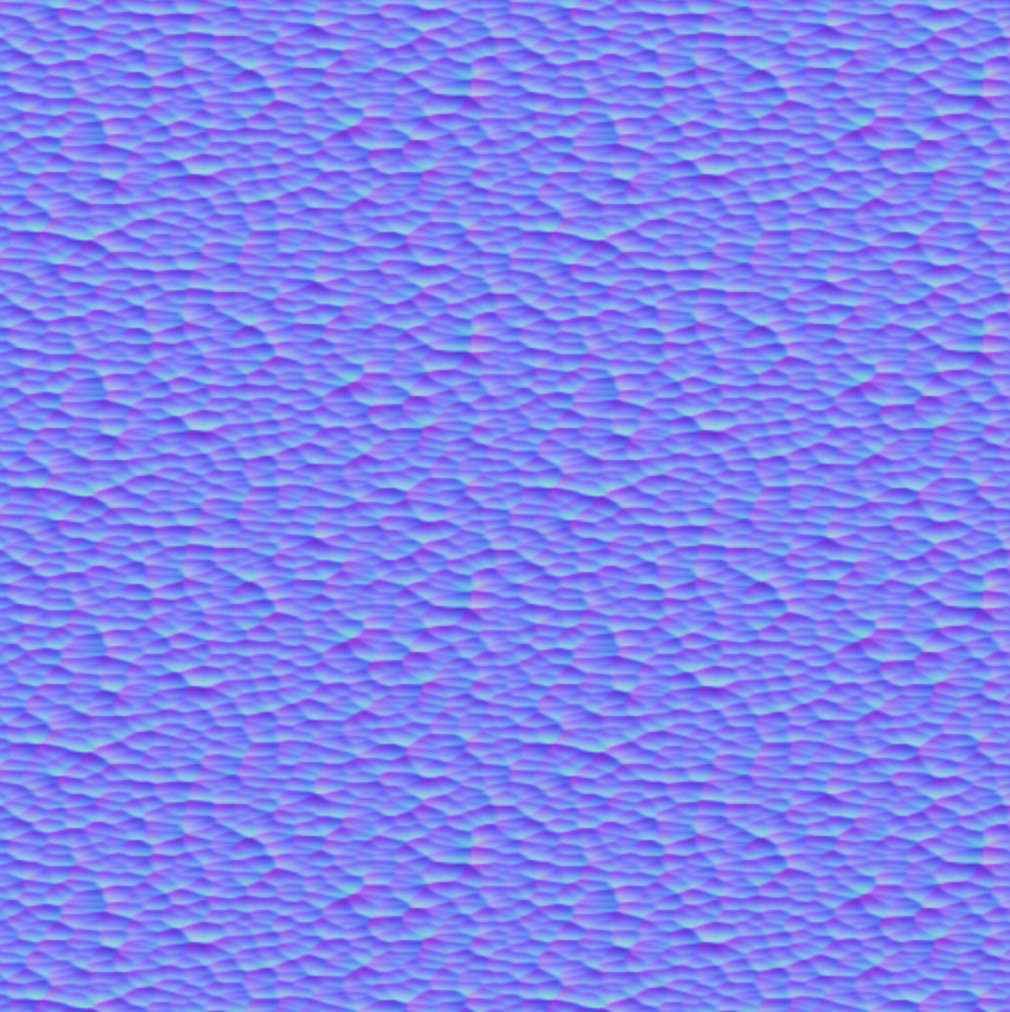
You’ll tile this map across the water and move it, perturbing the water normals, which will make the water appear to ripple.
// In water class..
func update(deltaTime: Float) {
let sensitivity: Float = 0.005
timer += deltaTime * sensitivity
}
fragment float4 fragment_water(VertexOut in [[stage_in]],
constant Params ¶ms [[buffer(ParamsBuffer)]],
texture2d<float> reflectionTexture [[texture(0)]],
texture2d<float> refractionTexture [[texture(1)]],
texture2d<float> normalTexture [[texture(2)]],
constant float& timer [[buffer(3)]])
{
constexpr sampler s(filter::linear, address::repeat);
float width = float(reflectionTexture.get_width() * 2.0);
float height = float(reflectionTexture.get_height() * 2.0);
float x = in.position.x / width;
float y = in.position.y / height;
float2 reflectionCoords = float2(x, 1 - y);
// rippling process
float2 uv = in.uv * 2.0;
float waveStrength = 0.1;
float2 rippleX = float2(uv.x + timer, uv.y);
float2 rippleY = float2(-uv.x, uv.y) + timer;
float2 ripple =
((normalTexture.sample(s, rippleX).rg * 2.0 - 1.0) +
(normalTexture.sample(s, rippleY).rg * 2.0 - 1.0))
* waveStrength;
reflectionCoords += ripple;
reflectionCoords = clamp(reflectionCoords, 0.001, 0.999);
float4 color = reflectionTexture.sample(s, reflectionCoords);
color = mix(color, float4(0.0, 0.3, 0.5, 1.0), 0.3);
return color;
}
float2 uv = in.uv * 2.0;tiling value- Calculate ripples by distorting the texture coordinates with the timer value

Adding Refraction

Implementing refraction is very similar to reflection, except that you only need to preserve the part of the scene below the clipping plane.
// In WaterRenderPass's draw function..
// render reflection..

descriptor.colorAttachments[0].texture = refractionTexture

guard let refractEncoder = commandBuffer.makeRenderCommandEncoder(
	descriptor: descriptor) else {
	  return
	}
refractEncoder.label = "Refraction"

clipPlane = float4(0, -1, 0, -water.position.y)
uniforms.clipPlane = clipPlane

render(renderEncoder: refractEncoder,
		scene: scene,
		uniforms: uniforms,
		params: params)
- descriptor에서 refraction Texture 변경 후 render encoder 생성
clipPlane의 경우 reflection과 대칭되는 평면으로
| Refraction Texture | Drawable Texture |
|---|---|
 |
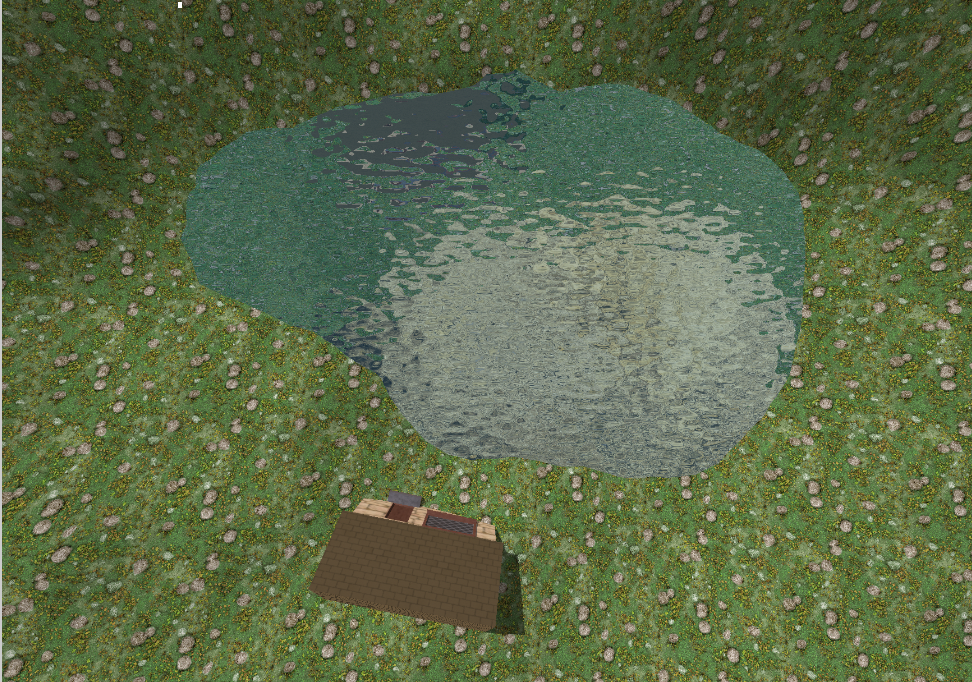 |
// In fragment_water function..
// just rendered unsing refraction Texture without reflection
float2 refractionCoords = float2(x, y);
refractionCoords += ripple;
refractionCoords = clamp(refractionCoords, 0.001, 0.999);

float4 color = refractionTexture.sample(s, refractionCoords);
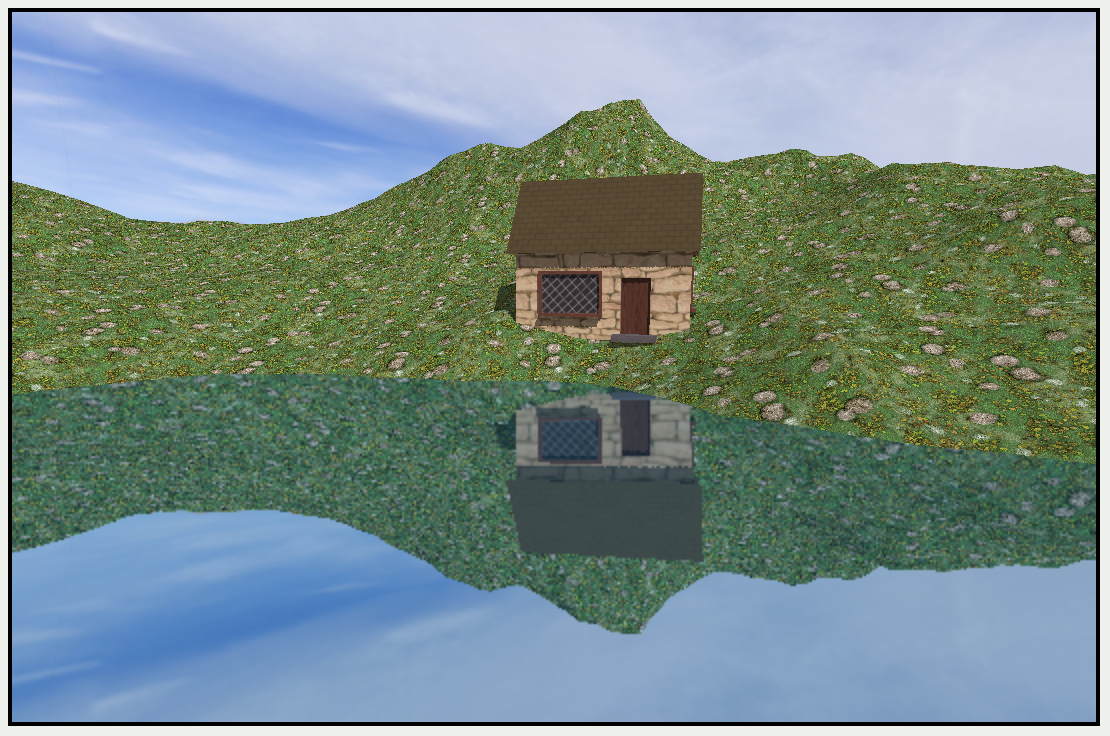
There’s one more visual enhancement you can make to your water to make it more realistic : Blending textures at the boundary area between under water and ground.
  constexpr sampler default_sampler(filter::linear, address::repeat);
  float4 color;
  float4 grass = baseColor.sample(default_sampler, in.uv * params.tiling);
  color = grass;

  float4 underwater = underwaterTexture.sample(
	    default_sampler,
	    in.uv * params.tiling);

  float lower = -1.3;
  float upper = 0.2;
  float y = in.worldPosition.y;
  float waterHeight = (upper - y) / (upper - lower);
  in.worldPosition.y < lower ?
	  (color = underwater) : (in.worldPosition.y > upper ?
   (color = grass) : (color = mix(grass, underwater, waterHeight))
   );
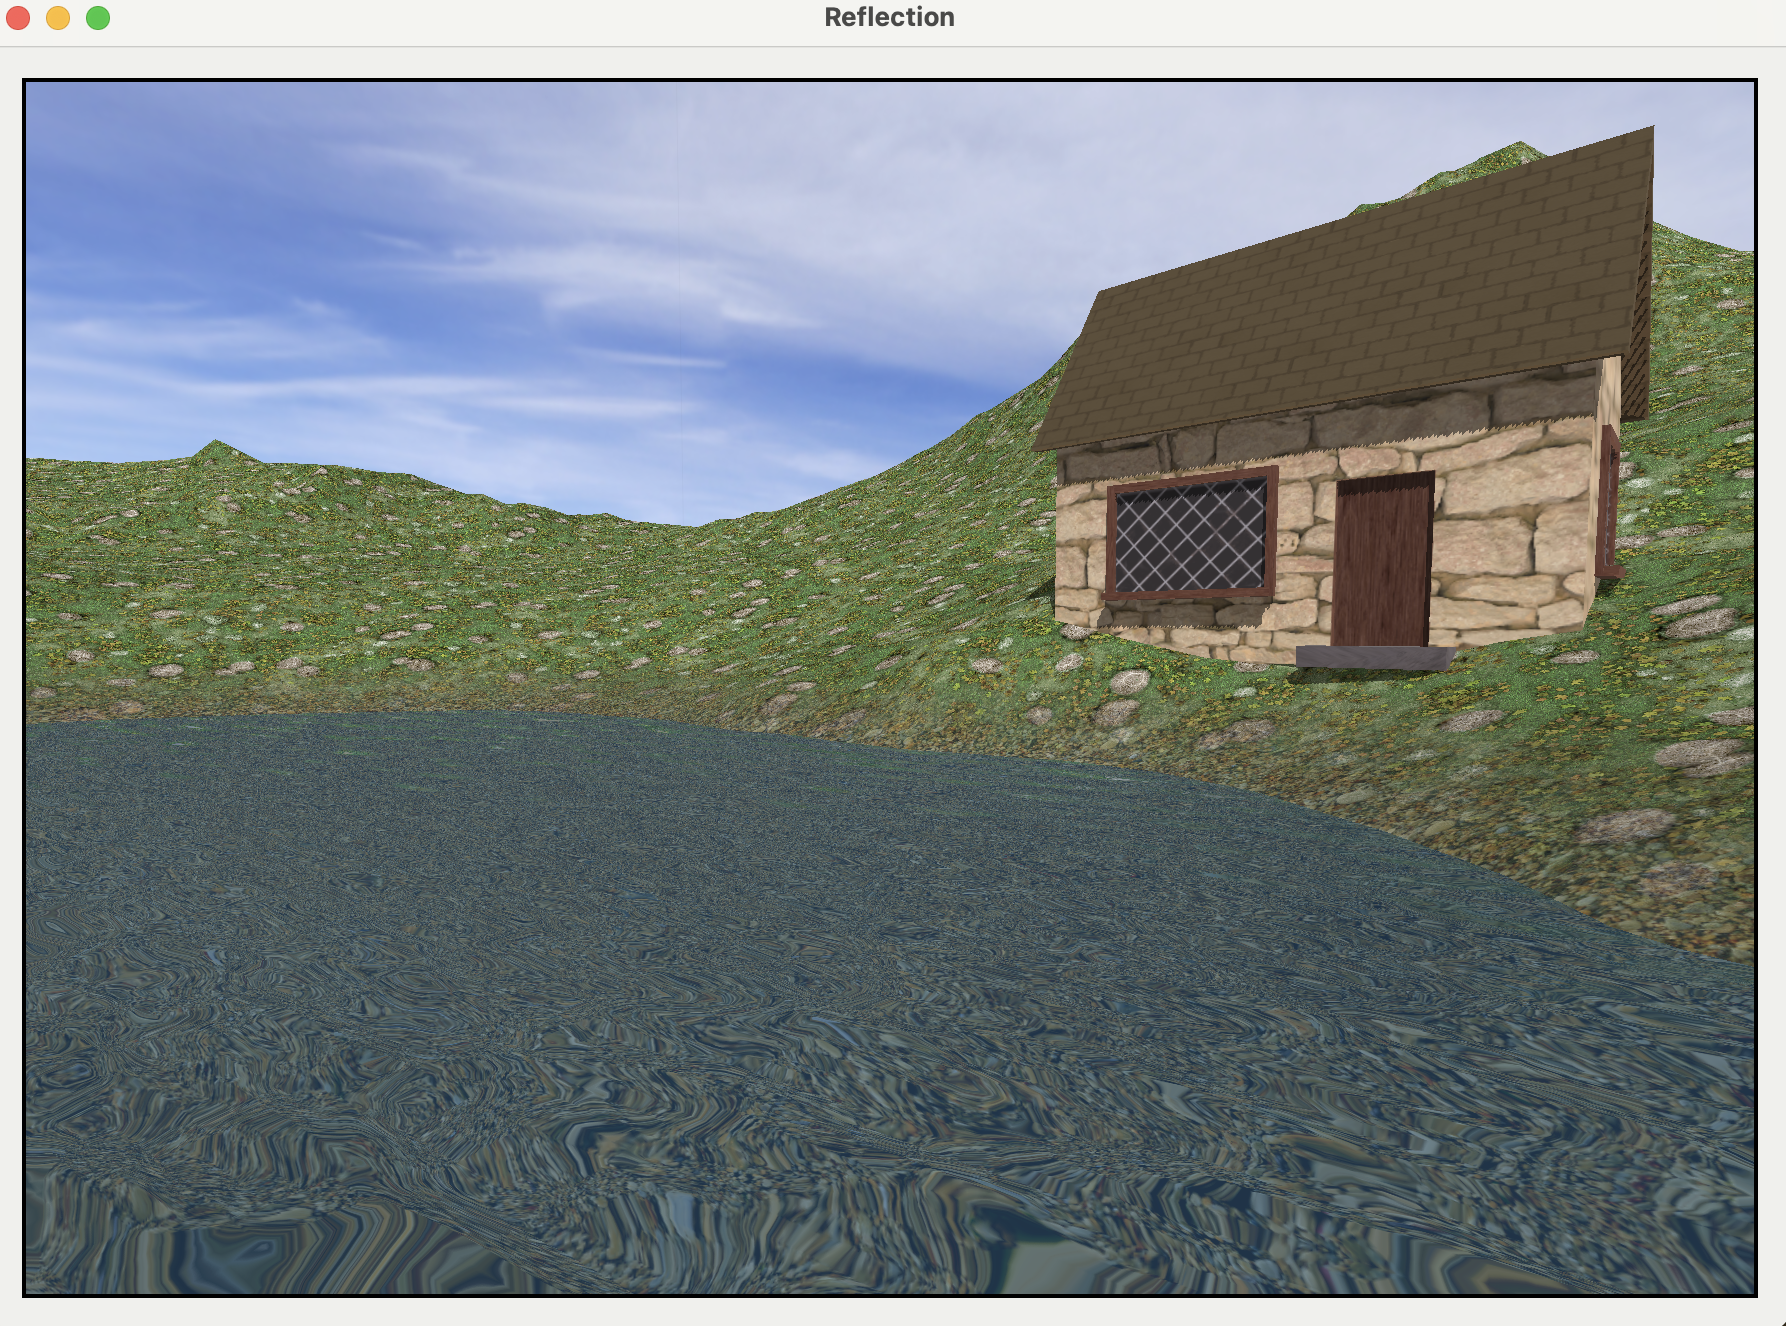
Fresnel Effect
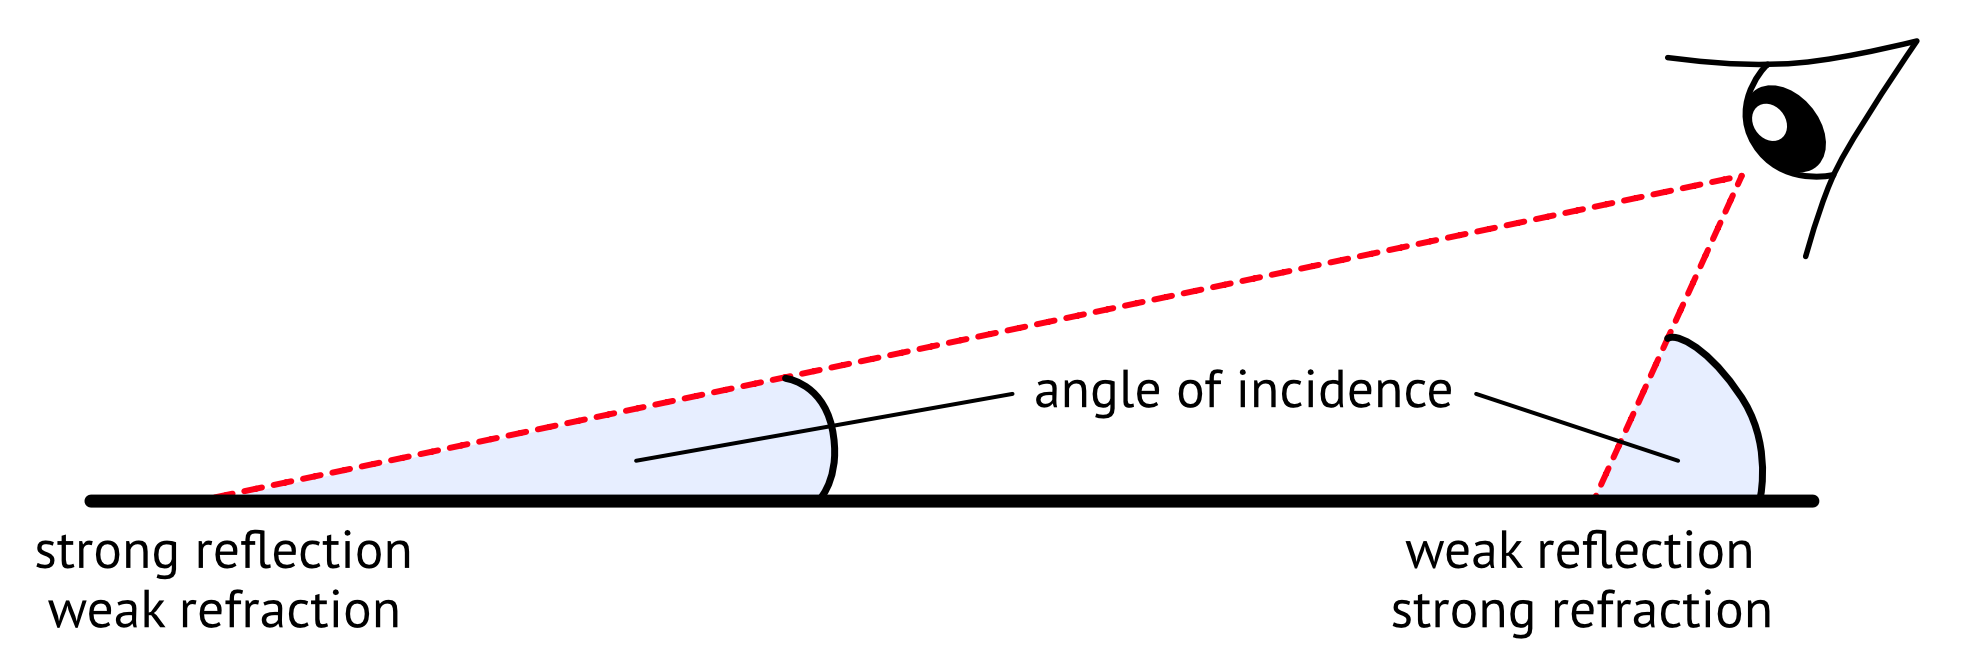
The viewing angle plays a significant role in the amount of reflection you can see. What’s new in this chapter is that the viewing angle also affects refraction but in inverse proportion
- The
steeperthe viewing angle is, the weaker the reflection and the stronger the refraction. - The
shallowerthe viewing angle is, the stronger the reflection and the weaker the refraction.
// In fragment_water function..
float3 viewVector = normalize(params.cameraPosition - in.worldPosition.xyz);
float mixRatio = dot(viewVector, float3(0, 1, 0));

return mixRatio;
- The mix ratio between refraction and reflection
float4 color =
    mix(reflectionTexture.sample(s, reflectionCoords),
        refractionTexture.sample(s, refractionCoords),
        mixRatio);
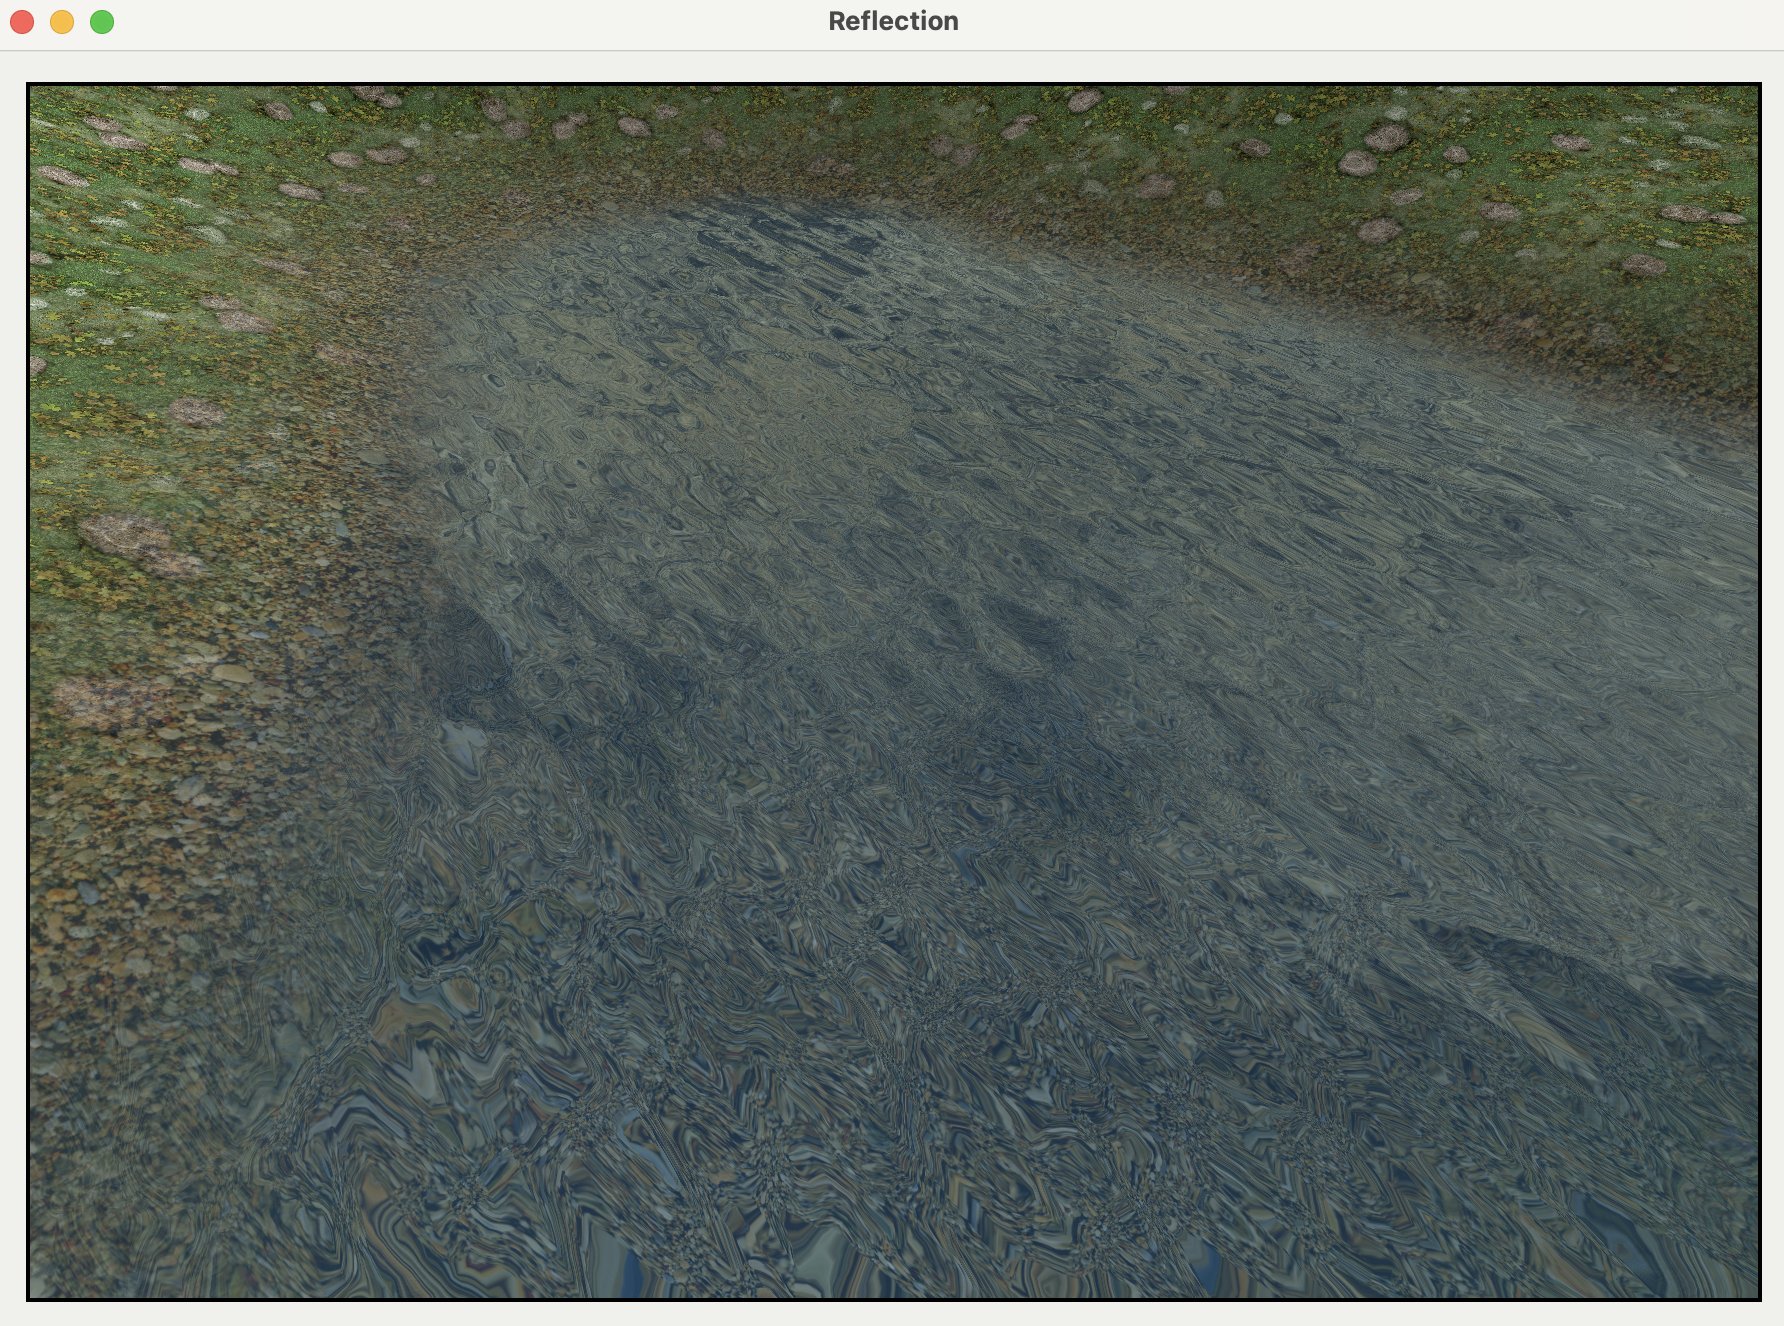
Adding Smoothness Using a Depth Texture
빛이 물 속을 통과할 때, 파장에 따라 흡수되는 정도가 다르다.
긴 파장 (붉은색 계열): 적외선에 가까운 붉은색, 주황색 빛은 물에 가장 먼저 빠르게 흡수됨.- 얕은 깊이에서도 금방 사라짐
짧은 파장 (푸른색 계열): 자외선에 가까운 푸른색, 녹색 빛은 물 속 더 깊은 곳까지 도달함
이 때문에 깊은 바다나 호수는 붉은 계열의 비은 흡수되고 푸른색 계열의 빛만 반사되어 돌아오므로 푸른색을 띠게 된다. 반면 수심이 매우 얕은 해변가에서는 대부분의 빛이 흡수되기 전에 바닥에 도달하므로 물이 비교적 투명하게 보인다.
따라서 depth texture를 통해 물의 깊이를 계산하고, 이를 통해 quality를 개선할 수 있다.
- 깊이가 얕은 곳(해변가) 에서는 물결 효과를 줄이고 투명도를 높여, 아래 지형이 더 선명하게 비치도록.
- 깊이가 깊은 곳(한 가운데) 에서는 물 색을 더 짙은 푸른색으로 만들고, 아래 지형이 잘 보이지 않도록 처리.
댓글 남기기